
Turning Figma Designs into WordPress Websites
It's never been easier to put a website together by exporting from Figma to WordPress

Converting Figma designs into your preferred content management system has never been easier.
Traditionally, web developers had to painstakingly transform designs into functional websites by hand — which took considerable time, but was (and still is) often considered the most accurate way of converting designs into fully functional websites.
That’s not to say a more automated way of Figma conversion doesn’t produce acceptable results. Far from it actually, as automation has significantly reduced the time required to convert designs to fully functional websites. Both seasoned developers and those who consider themselves novice web designers/developers can benefit from some form of automation.
In this article, we’ll break down why converting Figma designs to WordPress manually is still acceptable, as well as focus on automating where possible. We’ll also make a clear distinction between exporting from Figma and importing to WordPress, as each stage of the process can be automated to some degree.
Finally, we’ll briefly talk about plugins that connect to both Figma and WordPress and automate the entire process with the click of a few buttons. First, let’s focus on exporting from Figma manually.
Exporting from Figma
Export assets manually
Let’s get one thing straight: manually exporting assets from Figma has the potential to take forever, especially if your project spans multiple systems in a complex working environment.
If you’re working on the heading section for a simple brochure website, then exporting manually might fit this use case — but for any project more extensive than that, automating this process directly in Figma is much more efficient:
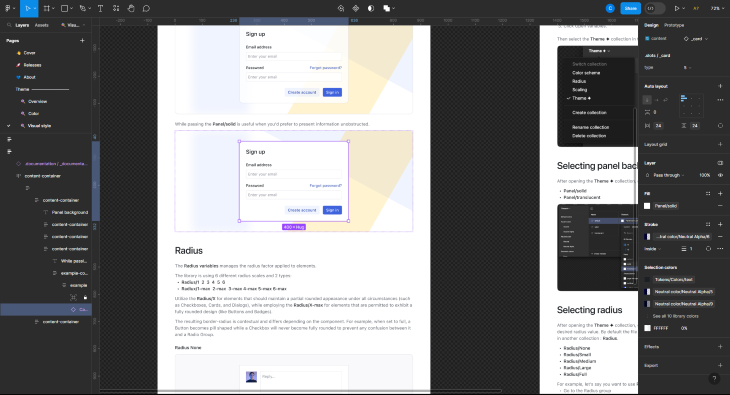

As you can see, doing this individually would take a great deal of time. Choosing an element, setting the scale, and choosing the image format would be cumbersome over multiple assets.
There’s also an issue with the above if you want to export multiple layers at once because the above will export our modal window as a flat PNG.
To select multiple layers, you need to select them manually. Then, when you go to export these assets, you’ll see the export button has changed to denote the number of layers that will be exported.
Automate exporting assets
Thankfully, Figma has ways to export multiple assets at once, making the export experience all the more seamless. Here’s how to export multiple elements at once:
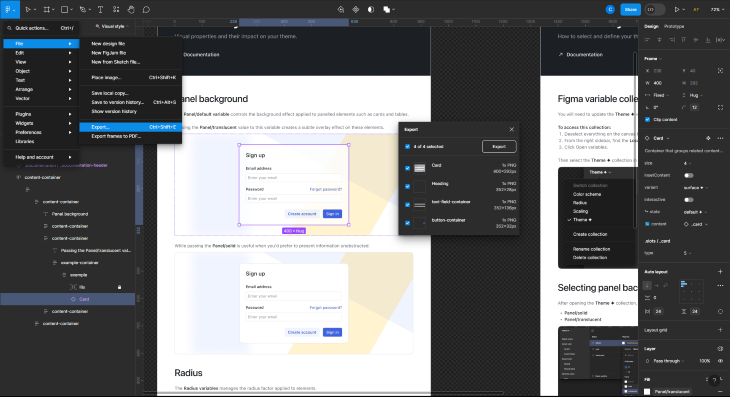
The above allows you to export multiple files, from multiple frames and boards, much quicker than doing it individually. Where the assets are exported to is entirely up to you and your workflow, but when export is selected, you’ll get an option to choose where the files are saved.
Some apps work in conjunction with Figma, such as Anima, that will export all of your assets as well as create corresponding code used within WordPress, but we’ll go into more detail on that in the Importing to WordPress section.
N.B., in addition to the Export option, users can make a custom Slice to capture a “picture” of everything together in a specific area. It’s a bit like taking a screenshot on a Mac and is great for quickly sending screenshots of specific features/elements to stakeholders or team members.
Importing to WordPress
A quick note before we move on: Remember the process at the beginning of converting Figma files to WordPress will always be the same. You’ll be importing and repurposing your assets from Figma to WordPress.
This can be done manually, or automated with the help of a plugin. At this point, you have two choices: use either plain HTML, inserted into the correct areas within the WordPress filesystem, or use a page builder such as Elementor or Divi.
Let’s go over both.
Building from scratch using HTML and PHP
If you’re a hands-on person who loves having complete control, manual conversion is the way to go when importing assets to WordPress. However, you’ll likely only be okay with this method if you’re confident in what you’re doing or are happy to get your hands dirty as a beginner.
At my job, this is what I would refer to as the “handover” process — I’m handing over designs, assets and documentation to someone who can build the project — usually an engineer.
You will be the engineer if you decide to build the website yourself.
Importing assets manually into WordPress does require a great deal of knowledge of web technologies — mostly HTML and PHP. Some might be put off by the amount of effort and time needed to use this approach.
You’ll need to be comfortable navigating and working with various PHP files in WordPress, including template files, functions.php, and possibly even custom theme or plugin files. This level of manual asset importing involves understanding these web technologies and their connections to ensure everything goes smoothly.
Building from scratch using an app
Let’s briefly go back to Figma.
Figma has several apps that can automate the export process further than what we were able to do at the start of this article. What’s an HTML code package? Think of it as a combination of files needed to create a dynamic website, as well as the assets exported from designs.
Essentially, these apps transform Figma designs into an HTML code package, which you can then import into WordPress with relative ease.
The ability and customisation offered by these apps vary, but generally speaking, they’re much easier to use than building a WordPress site from scratch using HTML and PHP.
It’s also possible for someone with a background in engineering to use such plugins to create websites quickly, and then use their knowledge to make sure it adheres to their expectations and professional standards.
Which plugin you use is entirely up to you, and HTML export plugins generally have similar steps, but let’s focus specifically on Anima and Yatako, as they’re the best-known within the industry.
Let’s take a look at two apps: Anima and Yatako.
Anima
Using Anima, you have the option to create a full HTML code package or extract code for individual components from your Figma design. It depends on what you need:
Anima can do two things, depending on your workflow needs. It can either export entire individual components as HTML or artboards as HTML.
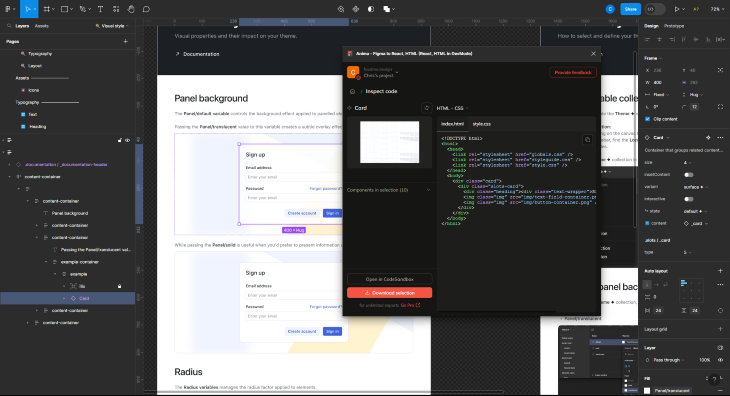
In this instance, I’ve selected the card component, opened Anima and pressed inspect code. After a short wait, the card is converted into HTML as well as the associated CSS. This can either be copied and pasted, or downloaded as an HTML code package:
Regardless of what you need, the process is straightforward.
For example, the transformation of your Figma design into HTML via a full HTML code package is a process that takes all of your different sections and elements, organises them accordingly, and outputs them into a folder.
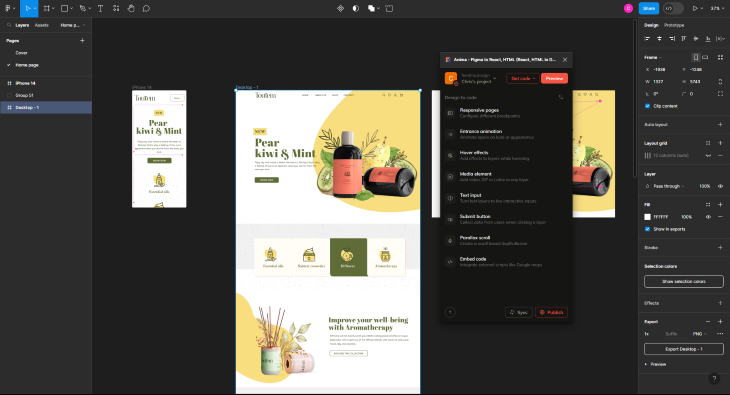
This is done by selecting the appropriate artboard, and then pressing Preview within Anima:
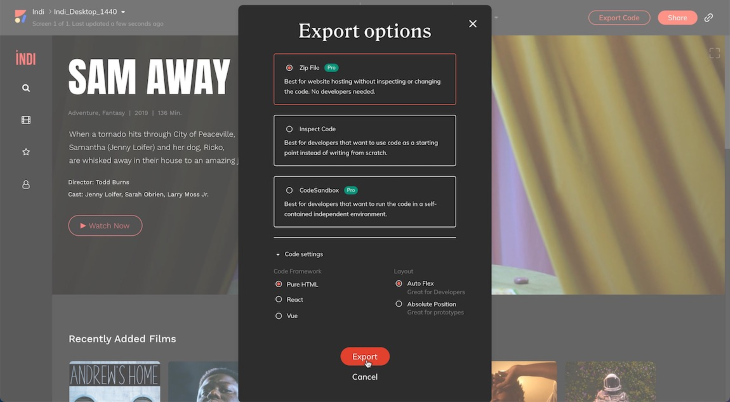
In the Export Options window, which will pop up on your screen, choosing the Zip File option located at the top will allow you to create a compressed zip, containing all the needed files.
Be sure to also select Pure HTML in the Code Framework section and Auto Flex under Layout — this will ensure that you have full control over how the design behaves responsively through WordPress:
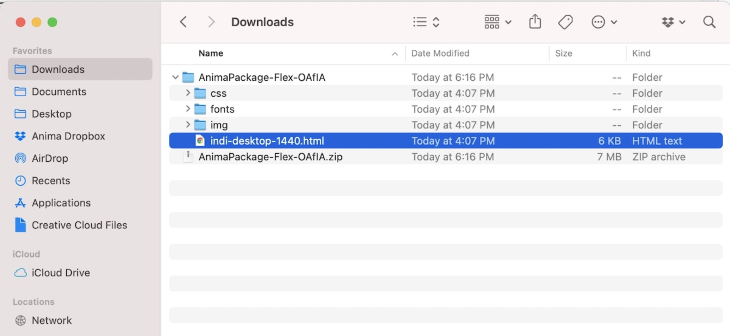
After clicking the Export button situated at the bottom of the window, a folder will have been created. Within that folder, you’ll have subfolders labeled HTML, CSS, img, and fonts — all clearly labeled to make the next stage easier, the integration of HTML within WordPress:
N.B., Naming your folders in Figma might seem optional, but it simplifies file and folder identification and makes development easier. It’s a small effort that can greatly enhance your workflow and keep your design projects organised efficiently.
With that done, what about integrating the HTML into WordPress? This is another task that can be done manually via building from scratch using HTML and PHP, or by using a simple method such as a WordPress plugin.
Regardless of the method you choose, this is probably the most involved part of the process, as you’ll need to be familiar with how WordPress works.
Yotako
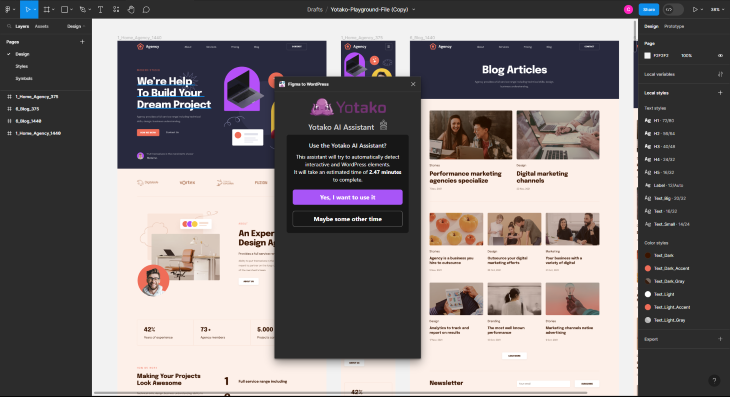
Yotako goes one step further than Anima, and that is that Yotako will not only convert your Figma design into a file package but will import it directly into WordPress as well, making this option the easiest way to convert Figma designs by far.
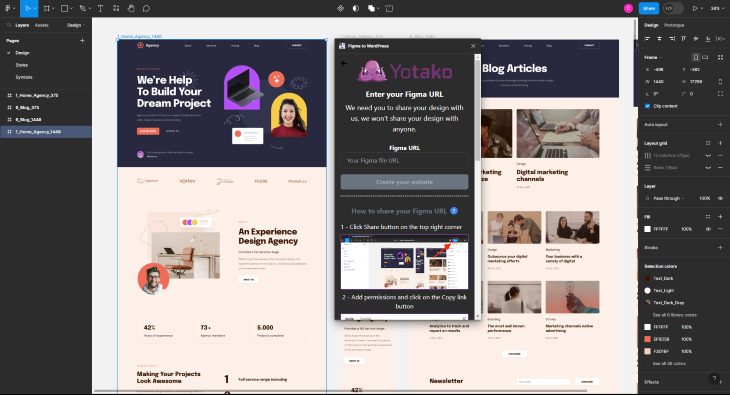
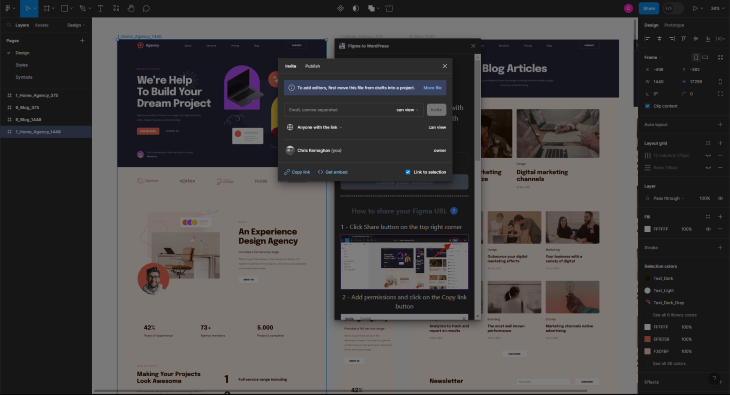
To get started with Yotako, you’ll need to share the URL for a direct link to the artboard you want to convert. To do this, select Share at the top right of the screen, then copy the link by pressing the copy link button. The URL will be copied, meaning you can go back to Yotako to paste it:
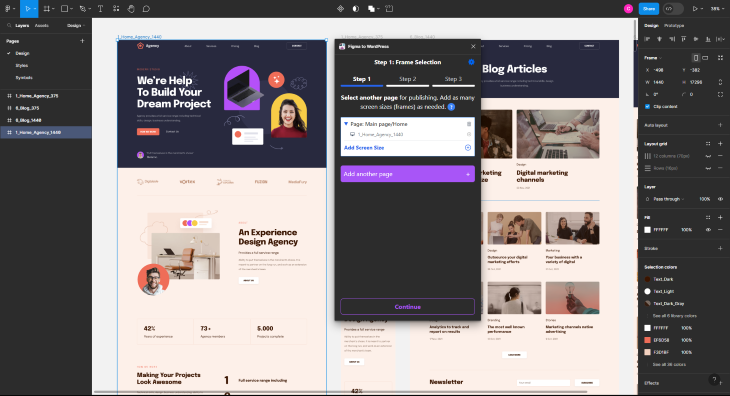
Yotako is ready to go. It’s automatically selected our first artboard because we’ve provided the link, but you can also add additional pages too:

We’ve now added two pages, a normal page (which is our homepage), and a blog page for a list of blog articles. When you’ve added all your pages, you’re ready for the next step!
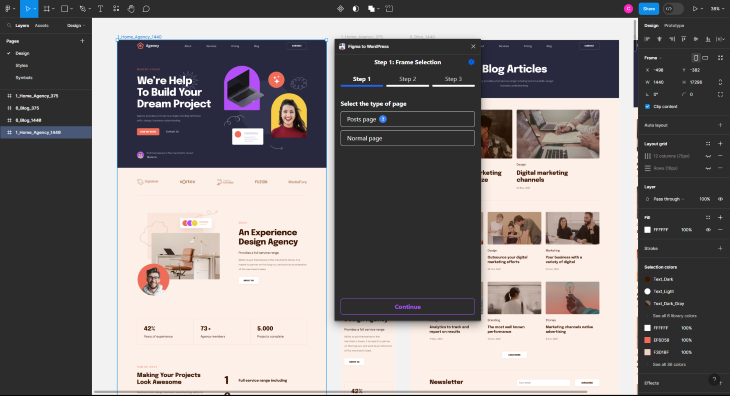
Everything seems to have AI baked into it now, and Yotako is no exception. The AI will try to determine what are interactive elements, but you can do this manually if the thought of AI doing this frightens you:
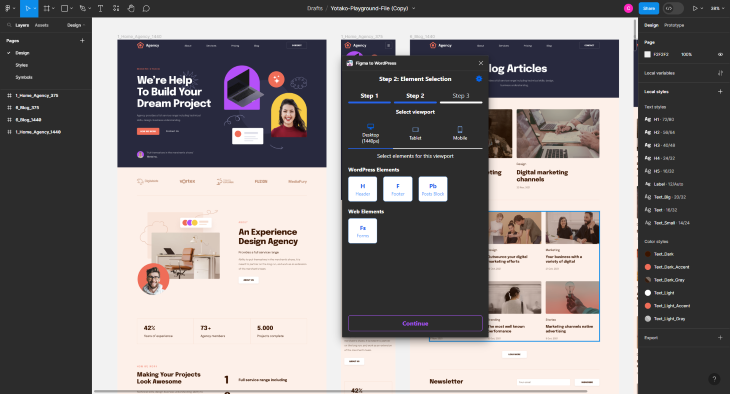
The above shows the manual process of telling Yotako how to determine page hierarchy. Choose Header for the Header section, Footer, etc.
That’s all there is to it!
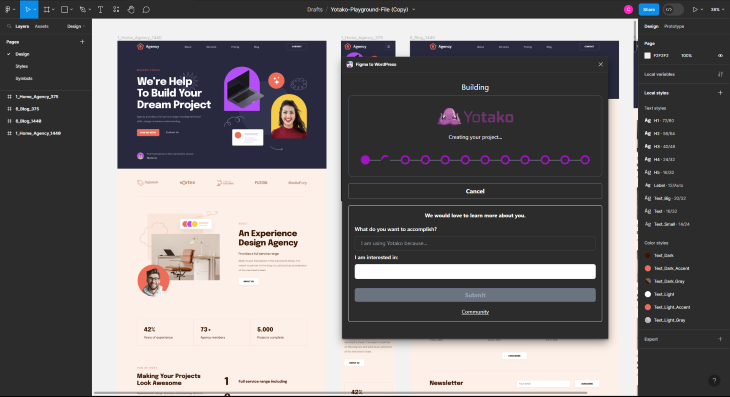
Selecting create will begin the creation process, directly converting your files to WordPress files, and uploaded to a temporary server to view the entire project as an interactive project.
What if I want to use a WordPress page builder?
WordPress page builders are fantastic for building websites using drag and drop (or what used to be known as WYSIWYG if you’re as old as I am!). They’re generally very simple to use, and intuitive and make the whole process of building a website much more straightforward.
Using a page builder means you’re much less likely to need to get into the backend of WordPress. That means no need for HTML or PHP — which some folks will genuinely be delighted at.
N.B., If you’re utilising a page builder, such as Anima or Yotako, you may encounter limitations in integrating automation plugins. The compatibility between these tools is currently not fully established.

Using a page builder is a little different from other approaches because you’ll be building the website on the frontend of WordPress, rather than the backend. What this means is that you’ll manually convert your Figma designs to WordPress in a way that’s much more visual.
All page builders use what’s known as “blocks,” and blocks are the basis for the header, navigation, hero image, feature section, footer section, and so on.
You stack these blocks together on the page, from top to bottom, header to footer. A page builder will then give you the option to choose padding, spacing, background colors, and what goes inside the blocks.
If you want to get more technical, you can usually click into an advanced tab if you want to add additional CSS or some custom JavaScript.
The main benefit of using a WordPress page builder is that when you’ve built out a project and it’s time to hand it over to a client, they’re more likely to understand the logic and intricacies of a page builder over straight HTML/CSS/PHP.
N.B., Using a page builder might be more straightforward for novices, page builders come with their own set of limitations and can result in sluggish loading times due to the additional code needed to run them.
Conclusion
The process of converting Figma files to WordPress has evolved, offering both manual and automated approaches to suit the needs of developers at all levels.
Whether you prefer the meticulous mastery of manual conversion or the efficiency of automation, the journey from design to a functional WordPress website has never been more flexible and accessible.
With a variety of options and tools at your disposal, you can now bring your designs to life on the web with greater ease and efficiency.


Comments ()